Why Top 40 Hits Crush Spotify’s -14 LUFS Rule – 4 Tips for Loud, Competitive Masters
If you’re just getting into music production, you’ve probably heard this advice floating around: “Spotify wants your masters at -14 LUFS, so that’s where you should master your tracks.” I hear this misconception all the time, and honestly, it’s one of the biggest mistakes new producers make.
Here’s the reality: Yes, Spotify will turn your track down to -14 LUFS if it’s louder than that. But if you actually master AT -14 LUFS thinking you’re following the rules, your song is going to sound significantly quieter and less impactful than every professionally mastered track on the platform.
The Truth About Commercial Masters
I recently analyzed the top 20 songs currently dominating the charts, and guess what? The quietest one, a Chris Brown song, clocked in at -9.5 LUFS. Some were pushing -6 LUFS. Every single professionally mastered track is still being mastered extremely loud, and there are good reasons for this.
First, there’s the loudness arms race that happens in the industry. The producer wants their demo to sound as loud and impressive as possible. The mixer wants to deliver something that sounds bigger and more competitive when they send it back to the producer and A&R. Finally, the mastering engineer needs to make sure it holds up against other commercial releases and more often than not wants to make sure it’s louder than the mix.
But beyond industry politics, there’s something more fundamental at play: Limited, forward, in-your-face sound is what we’re all used to hearing in top 40 music. That aggressive, compressed character isn’t just a byproduct of the loudness war – it’s actually part of the sound of modern commercial music.
The Real Problem: Your Low End is Eating Your Headroom
Here’s what I see 99.9% of the time when someone can’t get their master loud enough: it’s all about the kick, bass, and low-end frequencies. That’s where all your headroom gets consumed, and that’s what’s going to distort first when you slap a limiter on your mix bus.
I see this mistake constantly: someone finishes their mix, throws a limiter on the master bus, cranks it up to -8 LUFS, and wonders why everything sounds squashed and distorted. When I demonstrate this with tracks I’m working on, you can literally hear the whole mix fold in on itself. The kick and bass disappear, everything gets small-sounding, and distortion creeps in everywhere.
Here’s a simple test I do: take the kick and bass completely out of your mix and look at your waveform. You’ll be shocked at how much smaller it gets. This proves that these elements are consuming most of your available headroom, which is exactly why your limiter has to work so hard. (watch the video below to see this in action)
4 Techniques for Competitive Masters
1. Get Your Balance Right (The Boring but Essential Step)
I know, I know – this isn’t the sexy technique you came here for. But having a proper balance between your kick and bass is absolutely crucial if you want your limiter to not work overtime.
A lot of producers just want maximum bass because they think that’s part of the sound. And sometimes it is! But you need to find that sweet spot where you’re getting the impact you want without overwhelming your mix bus.
Here’s my go-to technique: pull your bass fader all the way down, then slowly bring it back up until you hear and feel it the way you want. This gives you a much more accurate reading of the actual level you need, rather than relying on the synth plugin’s output level. Nine times out of ten, it won’t be as loud as you initially had it.
2. Sidechain Your Bass to the Kick (Strategically)
This is something I do on almost every hip-hop and pop track with heavy drums and bass. But I’m not talking about that obvious pumping sidechain effect you hear in EDM. This is surgical.
I use Soothe2 to create a dynamic sidechain that only pulls out the specific frequency where the kick and bass are fighting for space. What this does is allow you to keep most of your bass information while creating space for the kick in that crucial low-end area.
In my setup, I typically target around 63Hz, and I’ve got it triggered by the kick. When the kick hits, just that narrow frequency band gets pulled down in the bass, but you still hear the bass clearly. Different songs will need different amounts, but this technique alone can free up significant headroom for your final master.
3. Use Clippers Strategically (Not Just on Your Master)
Everyone talks about using a clipper on the master bus before the limiter, and that’s great. But here’s what I do differently: I also clip my drum and bass subgroup.
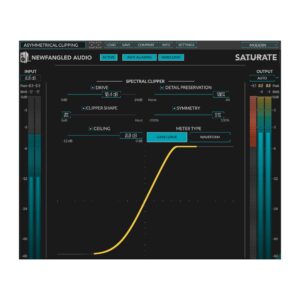
Think about it – why clip the entire master when all the problematic transient information is coming from your drums and bass? I’ll route all my drums and bass to a bus, then use a clipper like Newfangled Audio’s Saturate to shave off about 1dB of peaks.
The key is using your ears. I’ll often crank the drive all the way up, then slowly back it off until I can barely hear the difference. You want to find that sweet spot where you’re gaining headroom without obviously affecting the sound.
4. Stack Multiple Limiters
Instead of asking one limiter to do all the heavy lifting (and probably failing), I use multiple limiters in series, each doing a smaller amount of work.
For example, I’ll use a FabFilter Pro-L first, taking off just a couple of dB. Then I’ll add another limiter after that, taking off another small amount. By the time I’m done with this process – combined with all the previous steps – I’m often hitting -8 to -10 LUFS without the obvious distortion and pumping you’d get from pushing a single limiter too hard.
The Cumulative Effect
Here’s what’s beautiful about this approach: each technique builds on the last. The proper balance gives you a foundation. The sidechaining frees up crucial low-end headroom. The clipping removes problematic peaks. And the multiple limiters handle what’s left without working too hard.
By the end of this process, you’re not just hitting competitive loudness levels – you’re doing it while maintaining the punch, clarity, and dynamics that make professional masters sound professional.
The Bottom Line
Don’t get fooled by the -14 LUFS “rule.” Commercial music is still loud, and if you want your tracks to compete, you need to understand how to achieve that loudness properly. It’s not about brute force – it’s about smart gain staging, strategic processing, and understanding where your headroom is really going.
These techniques have helped me deliver masters that hold up against major label releases, and they can work for your music too. The key is building these concepts into your mixing process from the start, not trying to fix everything at the mastering stage.
Need help getting your tracks to competitive loudness levels? I’m currently offering unlimited revisions to first-time clients at mixandmastermysong.com.