When I first started mixing, I used to think gain was just another word for volume. I’d turn up a knob, things would get louder, and I’d think, “Cool, that’s gain.” But what I didn’t understand is that gain isn’t about how loud you hear something—it’s about how loud the signal enters the system. And if you get it wrong, no amount of EQ or compression will save your track.
Whether you’re recording vocals at home or mixing beats for a client, understanding gain—and how to manage it—is the difference between a clean, punchy mix and one that’s distorted, dull, or just doesn’t hit right.
What Is Gain, Really?
At its core, gain controls the strength of an audio signal at the input stage.
If you’re recording vocals, it’s the knob on your audio interface or preamp that determines how much signal you’re sending into your DAW. In plugins, it’s often labeled “input” or “trim.” Turn it up, and you boost the incoming signal. Turn it down, and you tame it before it reaches any processing.
To put it another way:
Gain is how loudly you whisper to the processor. Volume is how loudly the processor shouts back.
The distinction matters. If your gain is too low, you might crank plugins just to get a usable signal—and that introduces noise. If it’s too high, you clip the input and ruin your headroom before you even start mixing.
[showmodule id=”25108195″]
Gain vs Volume – Stop Confusing Them
Here’s where most beginners (and plenty of experienced producers) get tripped up:
|
Gain |
Volume |
|
|---|---|---|
|
Affects |
Input signal strength |
Output signal level |
|
Controlled by |
Mic preamp, input knob, trim |
Fader, master bus, speaker level |
|
Measured in |
dB (sometimes VU or RMS internally) |
dB, dBFS, or % depending on the system |
|
Main Purpose |
Optimize signal for processing |
Control how loud the signal is heard |
For example, if you’re using a Universal Audio Apollo, setting your mic gain is about ensuring your vocal hits the converters at a healthy level—ideally around -18 dBFS RMS (which is the digital sweet spot for most analog-style plugins). Turning up the fader in your DAW? That’s just volume.
Why Gain Staging Matters (And How to Do It Right)
Gain staging is the process of making sure every step of your signal chain—mic, interface, plugins, buses—is receiving and sending audio at the right level. Think of it as laying a solid foundation before you build your mix.
Here’s how to get it right:
1. Record at Proper Levels
Don’t aim for zero. That’s a habit from tape days. In digital, shoot for peaks around -6 dBFS and RMS around -18 dBFS. It gives your plugins room to breathe and keeps distortion at bay.
2. Use Clip Gain Before Plugins
If your recorded vocal is too quiet, don’t just turn up the fader. Use clip gain to raise the level before your plugins so your compressor, EQ, or saturator responds properly.
3. Level Match in Plugins
Most good plugins have input and output trims. Don’t just “set and forget.” If you boost EQ at 100 Hz, compensate with the output level to maintain gain balance.
Pro Tip: If something sounds different when bypassed—but isn’t louder or quieter—you did something good. If it just sounds louder, double-check your gain staging.
Common Gain Mistakes to Avoid
Let’s be real—I’ve made all of these at some point. Here are the biggest ones to watch out for:
-
Recording Too Hot: You think it sounds “full,” but your preamp is clipping, and you’re baking in distortion you can’t undo.
-
Using Faders to Fix Quiet Tracks: If your signal is weak, raising the fader won’t help the compressor “see” it properly. That’s why clip gain matters.
-
Stacking Plugins Without Checking Levels: One plugin boosts 6 dB, the next adds another 4 dB, and suddenly your bus is slammed. Always check levels between stages.
The Tools That Make Gain Easy

You don’t need fancy gear to get this right. Just the right habits.
-
Clip Gain (Pro Tools, Studio One, Logic, etc.): Adjust the raw audio clip’s level before it hits your inserts.
-
Trim Plugins: Keep one at the start of every track if you’re dealing with inconsistent levels or a bad recording session.
-
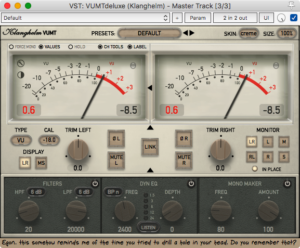
VU or K-Metering: These give you a better picture of perceived loudness rather than just peaks.
-
Reference Tracks: Always A/B your gain-staged mix against a pro track at equal loudness. If yours sounds weak or too aggressive, your gain structure might be off.
[showmodule id=”25108216″]
How Gain Impacts the Final Mix & Master
Your mix is only as good as your gain staging. Too hot, and you’ve got no headroom for mastering. Too cold, and your mix lacks life and presence.
One of the most common fixes I make when mastering a client’s track? Backing down the gain inside plugin chains so I can preserve the dynamic range. Some people call it “mixing into the red”—I call it fixing gain slop.
Getting this part right means your limiter won’t fight to tame peaks. It means your vocals won’t bury the guitars. It means your mix breathes the way a great record should.
Final Thoughts: Gain Is Your Secret Weapon
If you want your music to sound pro—tight, open, and emotionally impactful—it doesn’t start with a fancy plugin or a magic preset. It starts with understanding gain.
So the next time something sounds off in your session, don’t reach for the EQ right away. Check your gain.
And if you want a deeper breakdown of how I gain-stage vocals, instruments, and buses, check out my guide to getting a pro mix at home, or book a mix and let me show you what proper gain structure can really do.
