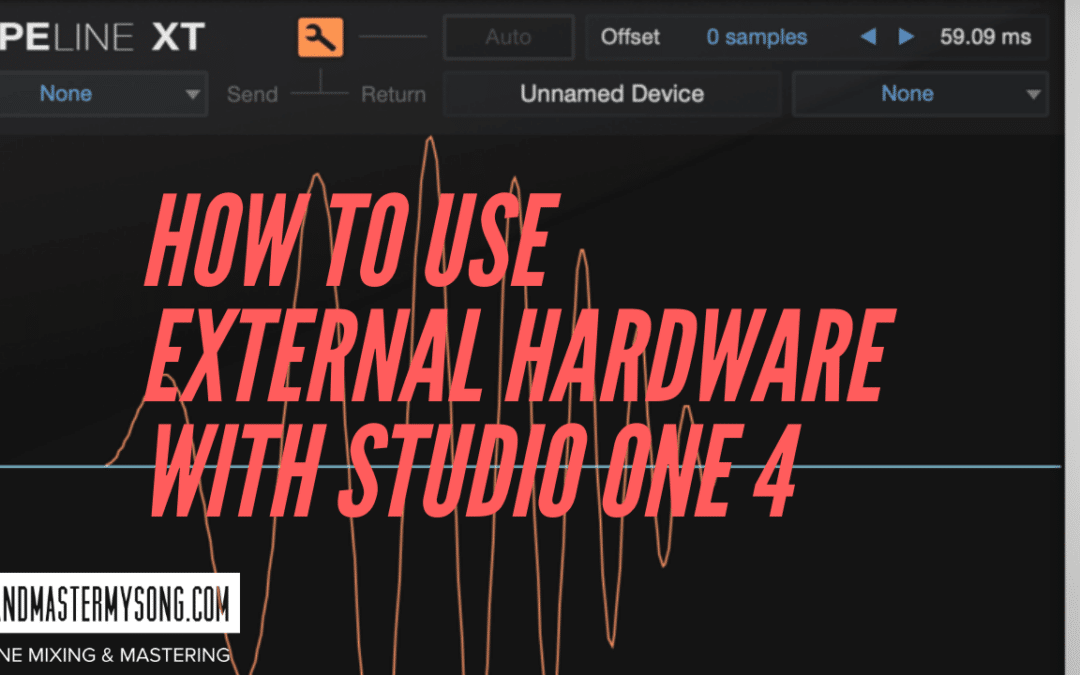
In studio one 4 they released Pipeline XT which improves upon the already great plugin. New features include:
- Automatic latency compensation: instead of sending a “ping” through the external effects processor and adjusting the delay manually, you can now simply click the “Auto” button after setting up the send and return connections, and the latency will be measured and compensated automatically.
- • The maximum delay has been increased from 5,000 samples to 32,000 samples
- It now supports mono sends and returns so you can save a hardware insert.
- A notepad to write notes about hardware settings.
- The ability to take a picture of your external hardware to make recall easy.
All these new features are so helpful to me. I use to use two other plugins to do this, so that was a total of 3 plugins on my chain taking up space! Now it’s all in one plugin with the Pipeline.
In the video below I show you how to set up external hardware and use the new Pipeline XT. Make sure to check it out, and if you have any questions leave them in the comments below!
[thrive_leads id=’7879′]
VIDEO TRANSCRIPT
What’s up guys. It’s Matty here, mixandmastermysong.com. Today I wanna show you how I set up my external hardware with Studio One. And the cool thing is they actually just came out with Studio One 4.1 and introduced the pipeline XT so I thought it’d be a good time to show you the cool new features in that which I think they really nailed and just how to do it.
So if you check out the screen here I have the new pipeline XT if you ever used pipeline before you can see it looks pretty different. Some pretty cool new meters and this whole section here. Basically what you do is you set up your in and outs in your audio settings which you can get to here in your audio IO and as you can see with my set up I have my master in which is basically the out of my mastering chain and then I also have a compressor here in my Neve.
And then in the output, I have my main output obviously going out one and two and then for why reference mixes when I AB when I’m working on a mix, the master out which is going out of this, out of the machine, I think I had that switched. So the in was going in. Anyway the Dion out, my compressor out and then the 1073 out. So that’s how I have my IO routing set up for my set up.
Yours might be different depending on if you’re using mics doing more recording and stuff. I strictly do mixing and mastering so this is kinda my set up. So anyway if we come back to our pipeline, you could see here you have an input and … I’m sorry, a send and a return. So the send is gonna be my master out so the way I wrote it is that it goes out of the computer into my mastering chain which is the first thing it hits is my master bus compressor here.
The port to go and so that’s master out and then it goes from there to my better maker. Now, this all stays in analog from there to my better maker to the Burl, where it returns digitally bainto to Studio One and my master in AES one and two.
so the cool thing is, you can name it whatever you want. So mastering chain, and then you used to have to ping to get the offset rights. But now, you just click auto and I’m going to hit play. You’re not going to hear it because this record has been released, but you’ll see just the meters go.
Why isn’t this … let’s see, let’s get this working. There we go, okay so and then you’re going to click auto. And see it’s offset the samples, and then you just take it out of this wrench mode which is the … what do they call it, the setup mode. And so now you already have your offset, so now we’ll be perfectly in line with studio one, you won’t have any sort of latency or issues like that. So that’s pretty cool, you just click the button and there you go. The offset has been automatically set for you, really cool feature.
Next which was a surprise that they did this is, I used to use either a recall on an Ipad or I’d take pictures and I think the guys over at the pro tools experts made a plugin that you can take a picture, and then I use another app called Notepad to write notes if I made just a setting change or something.
What’s cool with pipeline now is, they have it all in here for you, so you can take notes like, compressor on just so I know, in this song that I used the master bus compressor, so it’s on. Another great thing is, I can take a picture with my iPhone of this, and just airdrop it to my mac and then you click the picture button, and drag the image in. It will just tell me the image is limited, click yes and look. Now I have my settings from the portico right here, and when I recall the session, I can just dial it in and have everything in this one plugin. So super, super cool.
Another great feature on this is the mix knob, which I don’t necessarily use but if you wanted to use an out-boarded compressor for parallel compression or something like that, that might be cool. It also has a send gain and return gain. I use that sometimes, I put my drums on my Neve. So I’ll take all the drums out and run it through the Neve just to give it that sound that the Neve can give. But I return it a little hotter than I send it, so I can always just take this down a couple db and get it the same level to make sure I’m matching my mix sound. So anyway, really, really cool new feature, Pipeline XT. If you guys are using any sort of external gear, or you want to, this is how you do it in StudOneone. And it works really clean, and all the new features they have in 4.1 with it are really, really great.
So let me know if you have any questions or comments, just share them in the link … ask them in the comments below and please like and subscribe so I can keep making some content for you guys. Alri,ght thanks.


Did you get rid of your Faderport 8 and Console 1?
Hey! Yes I got rid of the faderport 8. I didn’t like the scribble strips, and I found myself just not using it much. So I sold it and now just have the single faderport. I feel it works best for me. 🙂