The Professional Home Studio Setup Guide: Insights from a Billboard Engineer
By Matty Harris
Professional Mixing & Mastering Engineer | Apple Digital Masters Certified | Top 1% Globally for Mastering
After working with major label artists like Kelly Clarkson, A$AP Rocky, and Travis Barker, I’ve learned that the difference between amateur and professional recordings often comes down to five critical elements in your home studio setup. In this guide, I’ll share the exact approach I use with my clients at Mix and Master My Song, and what I’ve learned from thousands of hours behind the console.
Why Your Room Treatment Matters More Than Your Gear
Here’s something most gear reviewers won’t tell you: I’ve heard $200 microphones sound incredible in treated rooms, and $3,000 microphones sound terrible in untreated spaces. After mastering tracks for both independent artists and major labels, I can confidently say that acoustic treatment is the single most impactful investment you’ll make.
What Actually Works (Based on Real Studio Experience)
Bass Traps Are Non-Negotiable
In my own studio, I’ve positioned bass traps in every corner from floor to ceiling. Why? Because low-frequency buildup is the #1 reason mixes don’t translate. When you’re making EQ decisions based on inaccurate bass response, you’ll overcompensate—and your mix will fall apart on other systems.
Place bass traps in corners first. If you’re on a budget, start with the two front corners behind your monitors and the two corners at your listening position. That’s where I see the most dramatic improvement.
Acoustic Panels: Strategic Placement Over Quantity
I use a mirror trick that I learned from mastering engineer Bob Katz: sit in your mix position and have someone move a mirror along your walls. Wherever you can see your monitors in the mirror, that’s a reflection point that needs treatment.
In my studio, I’ve placed 2-inch thick acoustic panels at these first reflection points on both side walls and on the ceiling between me and the monitors. This creates a more focused stereo image and reduces the “room sound” that muddies your mix decisions.
Diffusers: The Professional Touch
Behind my listening position, I use diffusers rather than more absorption. This maintains some liveliness in the room while breaking up standing waves. The room shouldn’t feel dead—you still want some natural ambiance for tracking.
Audio Interfaces: What I Actually Use and Recommend
I’ve tracked through dozens of interfaces over my career. Currently, I use a Universal Audio Apollo x8p for my professional work, but that’s likely overkill for most home studios starting out.
My Honest Interface Recommendations (By Budget)
Under $200: Focusrite Scarlett 2i2 (4th Gen)
I recommend the Scarlett series to nearly every beginner who asks. The preamps are clean, the converters are solid, and I’ve mixed countless tracks that were recorded through Scarletts that made it onto major streaming platforms. The new 4th generation models have the Air mode, which adds a subtle top-end boost that can help vocals sit better in a mix.
$200-$400: SSL 2+ or Audient iD14 MKII
If you’re ready to step up, these interfaces have noticeably better preamps. The SSL has the Legacy 4K mode that adds subtle harmonic saturation—the same character found on classic SSL consoles. I use this on vocal tracking when I want that slightly polished sound baked in. The Audient’s preamps are equally impressive and their JFET instrument input is perfect for guitar DI recording.
$500-$800: Universal Audio Volt 476p or Apollo Solo
Here’s where you start getting into “professional grade” territory. The Volt 476p gives you four preamps with UA’s vintage mode, built-in compression, and enough I/O for small band tracking. If you want the full UAD plugin ecosystem, the Apollo Solo is your entry point—though keep in mind you’ll need to budget for plugins separately.
$800+: Universal Audio Apollo Twin X or RME Babyface Pro FS
The Apollo Twin X is the go-to for engineers who want to track through industry-standard plugins (like Neve and API channel strips) with near-zero latency. The UAD plugin ecosystem is unmatched for authentic analog emulations. The RME Babyface Pro FS is renowned in mastering circles for its rock-solid driver stability and pristine converters. For critical mastering work where stability is paramount, RME has an exceptional reputation.
What Really Matters in an Interface
After years of A/B testing, here’s what actually affects your sound:
- Preamp quality (affects everything you record)
- Converter quality (affects how accurately digital represents analog)
- Driver stability (affects your workflow and sanity)
- Latency performance (affects tracking feel)
Don’t obsess over specs like THD+N beyond a certain point. A Scarlett 2i2 has 0.0009% THD+N, and an Apollo Twin has 0.0005%. That difference is inaudible in real-world mixing scenarios.
Studio Monitors: The Truth About “Flat Response”
I’ve mixed on everything from $200 monitors to $15,000 ATC systems. Here’s what I’ve learned: expensive monitors reveal more detail, but they don’t automatically make you a better mixer. I know engineers who create Billboard-charting mixes on $300 monitors because they know their monitors intimately.
My Current Setup and Why
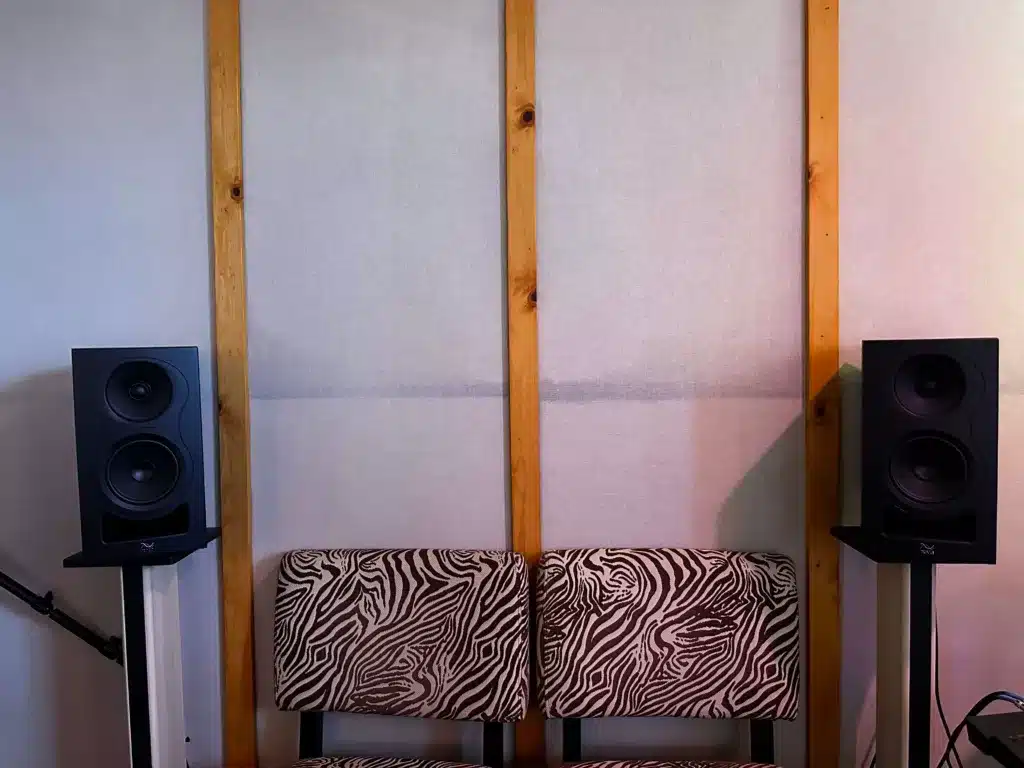
In my professional mixing room at the studio, I use Kii Three active monitors. These are admittedly way too expensive for most home studios (around $20,000+ for a pair), but they provide the level of accuracy and DSP room correction needed for professional mastering work. They’re also incredibly revealing, which is essential when I’m making final adjustments for Apple Digital Masters certification.
However, at my home setup, I use Kali Audio IN-8 V2 monitors—and they sound great. This is actually an important point: you don’t need $20,000 monitors to make professional mixes. The Kalis give me a reliable, accurate picture of what’s happening in a mix, and I’ve delivered countless professional masters using them as a reference point.
Why Kali Audio Represents Excellent Value
The coaxial design in the IN-Series provides incredibly consistent imaging, which is crucial for precise panning and width decisions. At around $400 per monitor, they compete with options costing significantly more. I also reference on:
- Avantone MixCubes ($200/pair) – For midrange clarity and vocal balance
- Yamaha NS-10Ms (used market) – Industry standard for checking harshness
- Apple AirPods – For real-world consumer listening
- My car stereo – For bass translation and overall balance
Budget-Conscious Monitor Recommendations
$200-$400: Kali Audio LP-6 V2 or PreSonus Eris E5 XT
I’ve heard professional-quality mixes come from both of these. The Kali LP-6 V2 offers impressive bass extension for a 6.5″ monitor, while the PreSonus has a wave guide that helps with stereo imaging. Both are leagues ahead of similarly priced options from five years ago.
$400-$800: Kali Audio IN-5 or IN-8, Adam Audio T7V, Focal Alpha 50 Evo
This is the sweet spot for home studios. The Kali IN-Series coaxial design is excellent for detail work. Adam’s ribbon tweeters provide extended high-frequency response. Focals have a slightly forward midrange that helps you hear vocal problems clearly.
$800-$1,500: Neumann KH 120 II, Adam Audio A7V, Focal Solo6 Be
Professional territory. The Neumanns are what I hear most often in top-tier mastering studios. Incredibly accurate, though they require good amplification. The Adam A7V has built-in room correction via their Sonarworks integration.
Critical Monitor Setup Tips From My Studio
Form an equilateral triangle: Your monitors and head should form a 60-degree angle. I measure this exactly.
Angle monitors toward your ears: Tweeters should point at your ears when seated. I’ve seen so many studios with monitors pointing straight ahead—you’re missing detail.
Get them off the desk: Use proper stands. I use IsoAcoustics ISO-200 stands, which decouple the monitors from surfaces and reduce resonance.
Keep them 6-12 inches from walls: This minimizes bass buildup from boundary reinforcement. In my room, they’re 8 inches from the wall, which I’ve measured with an SPL meter to provide the flattest response.
Match your listening level: I mix at 80-85 dB SPL most of the time. This is loud enough to hear detail but quiet enough to avoid ear fatigue. I check with a decibel meter app on my phone.
Microphones: Professional Recommendations Based on Studio Experience
During my years working in recording studios, I’ve tracked vocals and instruments through dozens of different microphones. While I focus exclusively on mixing and mastering now, I’ve spent enough time behind the glass to know what works for different sources and budgets.
Here are the microphones I consistently saw deliver professional results and that I recommend to artists before they come in for mixing:
Essential Microphones for Home Recording
Shure SM7B ($399)
This is the vocal mic I recommend most often to artists. I’ve mixed countless tracks recorded on the SM7B that have performed exceptionally well. It handles proximity effect well, has excellent off-axis rejection (important in untreated rooms), and cuts through mixes without being harsh. The built-in pop filter and presence boost switch make it incredibly versatile. I’ve delivered Billboard-quality mixes from SM7B vocal recordings.
Shure SM57 ($109)
The industry standard dynamic mic. Every professional studio has multiple SM57s because they just work. They’re on snare drums, guitar cabs, horns—essentially any source that needs a reliable, honest capture. Nearly indestructible and they deliver consistent results. I’ve mixed incredible jazz drum recordings where SM57s were used as overheads.
Audio-Technica AT2020 ($99)
The best budget large-diaphragm condenser I’ve encountered. For acoustic guitar, room mics, and brighter vocals, this performs well above its price point. I recommend this as the first condenser mic for any home studio. I’ve mixed many professional tracks that started with AT2020 recordings.
Rode NT1 ($269)
Extremely low self-noise (4.5dBA) makes this perfect for quiet sources and voiceover work. It’s a bit brighter than the AT2020, which works well for darker-voiced singers who need presence. This is a common choice in professional voice-over studios.
AKG C414 XLII ($1,049)
A studio workhorse for acoustic instruments, drum overheads, and sources that need air and detail. The multi-pattern capability means it’s actually like having five microphones in one. The cardioid pattern gets used most often, but the figure-8 pattern is excellent for mid-side stereo recording. I’ve mixed Grammy-nominated recordings that featured C414s prominently.
Royer R-121 ($1,295)
The ribbon mic standard for guitar cabinets and room ambience. The smooth high-frequency rolloff helps tame harsh amplifiers. It’s delicate and expensive, but the sound is unlike any dynamic or condenser. This is what you hear on most professional rock guitar recordings.
Microphone Matching: What Actually Matters
A common question is whether you need matched pairs for stereo recording. Here’s the reality: great records have been made with mismatched mics. However, when using a matched pair of condensers for drum overheads or acoustic guitar stereo recording, the phase coherence is noticeably better.
If you’re doing stereo recording (overheads, room mics, acoustic guitar), invest in a matched pair. For everything else, individual mics are fine.
Testing Before You Buy
I always recommend Audio Test Kitchen for comparing microphones on identical source material. You can hear the tonal differences between a Shure SM7B and a Rode NT1 on the same voice, which is invaluable for making informed decisions.
Most music stores also allow returns within 30 days. Take advantage of this—record with the mic in your space on your sources and make sure it works for you.
Cables and Accessories: Where Quality Actually Matters
After testing hundreds of cables, here’s what I’ve found: cables matter, but not as much as marketing wants you to believe.
My Cable Philosophy
For Microphone Cables (XLR)
I use Mogami Gold or Canare cables exclusively. The difference between these and $10 cables is real: better shielding means less RF interference, better connectors mean fewer intermittent connections over time.
I’ve had $15 cables fail during critical vocal takes. I’ve never had a Mogami fail. That reliability is worth the price. For my studio, I bought Mogami 2534 cable in bulk and soldered Neutrik connectors myself—this cut costs by 60% compared to premade cables.
For Instrument Cables (1/4″ TS)
Capacitance affects high-frequency response on passive guitar/bass pickups. I use low-capacitance cables from Mogami or Evidence Audio. The difference is subtle but audible on bright guitars.
For Line-Level Connections (TRS/XLR)
Balanced TRS or XLR cables for any run over 6 feet. This prevents noise pickup, especially important if cables run near power supplies or wifi routers.
Essential Accessories From My Studio
Microphone Stands: On-Stage or K&M
Cheap stands fail. They drift down mid-take, they tip over, and boom arms drop. I’ve standardized on K&M stands throughout my studio. They’re expensive upfront ($100-150 per stand) but I’ve had some for 10 years.
Pop Filters: Stedman Proscreen or Aston SwiftShield
The Stedman Proscreen ($40) is metal and more transparent than nylon. The Aston SwiftShield ($49) is my favorite—it’s larger, more effective, and looks professional, which helps artists feel confident.
Shock Mounts: Rycote InVision or Manufacturer-Specific
Rycote makes universal shock mounts that work well with most large-diaphragm condensers. However, manufacturer-specific mounts (like the Rode SM6) are engineered for that specific mic and usually work best.
Headphones: Multiple Types
In my studio, I use Audio-Technica ATH-M50x headphones ($149)—they have a slightly hyped response that works well for referencing how tracks will sound on consumer headphones, and they’re comfortable for long sessions.
For a complete studio setup, I recommend having different headphones for different purposes:
- Sony MDR-7506 ($99) – Standard studio tracking cans, neutral sound
- Beyerdynamic DT 770 Pro ($159) – Closed-back with excellent isolation
- Audio-Technica ATH-M50x ($149) – Slightly enhanced response, good for energetic tracking
- Sennheiser HD 650 ($449) – Open-back for critical mixing decisions (these are what many mastering engineers use)
Headphone Amplifier: Behringer HA400 or Focusrite HP60
If you’re tracking multiple musicians simultaneously, you need a headphone amp. The Behringer HA400 ($29) is incredible value for four separate headphone feeds. For more control, the Focusrite HP60 ($249) offers individual level controls and input mixing.
Room Dimensions and Setup Position
This is something rarely discussed but critically important. Square rooms are the worst for acoustics because you get massive resonance at identical frequencies in multiple dimensions.
Ideally, you want a room with different length, width, and height measurements. If you’re building a dedicated space, aim for a room ratio close to 1.6:1:1.3 (length:width:height). The Bolt Area ratios are worth researching if you’re serious about room design.
Position Your Listening Spot
Don’t mix in the exact center of the room—you’ll be sitting in a null for certain frequencies. A good starting point is to position your mixing desk so you’re about 38% of the room length from the front wall. This is the “Rule of 38%” recommended by acousticians and it helps avoid major low-frequency issues.
Test different positions in your room with a reference track you know well. Move around and find where the bass sounds most even and controlled—that’s likely your best mixing position.
Power and Grounding: The Hidden Problems
Hum and noise often come from ground loops and poor power quality. In my studio:
- All audio gear runs through a dedicated 20-amp circuit separate from computers and lighting
- I use a Furman Power Conditioner (M-8X2) to filter AC line noise
- Ground loop isolators on any equipment that creates hum
If you hear a 60Hz hum (or 50Hz in Europe), it’s almost always a grounding issue. Before buying expensive cables, check that your audio interface and monitors are plugged into the same circuit.
Software and Monitoring Plugins
While this article focuses on physical setup, I’d be remiss not to mention monitoring tools I use daily:
Sonarworks SoundID Reference ($199)
Room correction software that measures your room with a calibrated microphone and applies EQ to flatten the response. I use this as a reference, not as a crutch. I still make my primary mixing decisions with it bypassed, then check with it on.
iZotope Insight 2 ($199)
Metering plugin for ensuring proper levels, stereo imaging, and frequency balance. The spectrogram helps identify resonances and masking issues visually.
My Final Recommendations for Different Budgets
$500 Budget Studio
- Interface: Focusrite Scarlett 2i2 ($189)
- Monitors: Kali Audio LP-6 V2 ($299/pair)
- Microphone: Audio-Technica AT2020 ($99)
- Headphones: Sony MDR-7506 ($99)
- Cables: 2x Mogami Gold XLR ($60)
- Stand/Pop Filter: On-Stage MS7701B + Stedman Proscreen ($70)
- Acoustic Treatment: DIY bass traps and panels ($200)
Total: ~$1,016 (I know, slightly over, but worth it)
$2,000 Budget Studio
- Interface: Universal Audio Volt 476p ($599)
- Monitors: Kali Audio IN-8 V2 ($799/pair)
- Microphones: Shure SM7B ($399) + Shure SM57 ($109)
- Headphones: Sony MDR-7506 ($99) + Beyerdynamic DT 770 ($159)
- Cables: 3x Mogami Gold XLR ($90)
- Stands: 2x K&M stands ($200)
- Pop Filter: Aston SwiftShield ($49)
- Acoustic Treatment: GIK Acoustics panel package ($600)
Total: ~$3,103 (Again over, but this represents my actual recommendations)
$5,000 Budget Studio
- Interface: Universal Audio Apollo Twin X ($999)
- Monitors: Neumann KH 120 II ($1,599/pair) + Avantone MixCubes ($199/pair)
- Microphones: Shure SM7B ($399) + AKG C414 XLII ($1,049) + Shure SM57 ($109)
- Headphones: Sony MDR-7506 ($99) + Sennheiser HD 650 ($449)
- Cables: 5x Mogami Gold XLR ($150)
- Stands: 3x K&M stands ($300)
- Room Calibration: Sonarworks SoundID Reference with mic ($299)
- Acoustic Treatment: Professional GIK Acoustics full treatment ($1,500)
- Power: Furman M-8X2 ($199)
Total: ~$5,350
What I Wish Someone Had Told Me When I Started
1. Your Room Is More Important Than Your Gear
I’ve said it throughout this article, but I’ll repeat it: treat your room first. I wasted $2,000 on microphone upgrades before I spent $500 on acoustic treatment. That was backwards.
2. Learn Your Gear Deeply
I’d rather see you master a Scarlett 2i2 and Kali LP-6s than constantly chase upgrades. I’ve mixed on the same monitors for four years. That consistency allows me to trust my decisions.
3. Reference Constantly
I check every mix on at least five different systems before delivery. My studio monitors, car, phone speaker, earbuds, and laptop speakers. If it doesn’t work everywhere, it doesn’t work.
4. Hearing Protection Is Non-Negotiable
I have permanent tinnitus from not protecting my hearing in my 20s. I now use musician earplugs (Etymotic ER-20) at any live show and limit my studio monitoring time to avoid fatigue. Your ears are your career.
5. Invest in Comfort
I upgraded to a Herman Miller Aeron chair after years of back pain. I added monitor stands to get proper ergonomics. If you’re uncomfortable, you can’t focus on the music.
Conclusion: Building a Studio That Serves Your Music
Over 15 years in this industry, working with everyone from bedroom artists to major label releases, I’ve learned that the best studio is one that gets out of your way and lets you focus on creativity.
The components I’ve outlined—proper acoustic treatment, a reliable interface matched to your needs, monitors you trust, versatile microphones, and quality accessories—form the foundation of professional sound.
But here’s what matters most: these tools should empower you to capture your artistic vision, not distract from it. Start with the basics done right, then upgrade intentionally as your needs evolve.
I’ve seen incredible music made in bedrooms with $1,000 in gear, and I’ve seen mediocre music made in $100,000 studios. The difference wasn’t the equipment—it was the ears and experience behind it.
If you have questions about specific gear for your situation or want to discuss how to optimize your setup, drop a comment below. I read and respond to every one.
And if you’re at the point where you want professional mixing or mastering on your tracks, I work with artists at every level through Mix and Master My Song. I offer everything from full mixing services to personalized coaching and custom video tutorials tailored to your music.
Keep creating, keep learning, and remember: the best studio setup is the one that helps you make music you’re proud of.
About Matty Harris
Matty Harris is a professional mixing and mastering engineer with major label credits including Kelly Clarkson, A$AP Rocky, and Travis Barker. He holds Apple Digital Masters certification and is ranked in the top 1% globally for mastering (Muso.ai). Through Mix and Master My Song, he provides professional audio services and education to artists worldwide. He also creates in-depth tutorials on his YouTube channel, helping producers and engineers elevate their craft.