Introduction
As a mixing and mastering engineer, I’ve spent countless hours fine-tuning my workflow and experimenting with various tools to achieve the perfect sound. One plugin that has consistently impressed me with its versatility and precision is FabFilter’s Pro-Q3. Whether I’m working on a delicate acoustic track or a hard-hitting electronic mix, Pro-Q3 has become my go-to equalizer for sculpting and shaping audio.
In this article, I want to share with you the top five ways I use FabFilter Pro-Q3 in my mixing and mastering sessions. From making surgical cuts to employing Mid/Side EQ techniques, these methods have significantly enhanced the quality of my mixes. I hope these tips will not only help you get the most out of Pro-Q3 but also inspire you to explore its full potential in your own projects.
Let’s dive in and explore how you can leverage the power of Pro-Q3 to elevate your music production.
1. Surgical Cuts
One of the primary reasons I rely on FabFilter Pro-Q3 is its ability to perform surgical cuts with exceptional precision. Surgical cuts are essential when you need to remove problematic frequencies that can muddy up your mix or cause unwanted resonances. Here’s how I use Pro-Q3 to make these precise adjustments.
Step-by-Step Guide to Performing Surgical Cuts with Pro-Q3
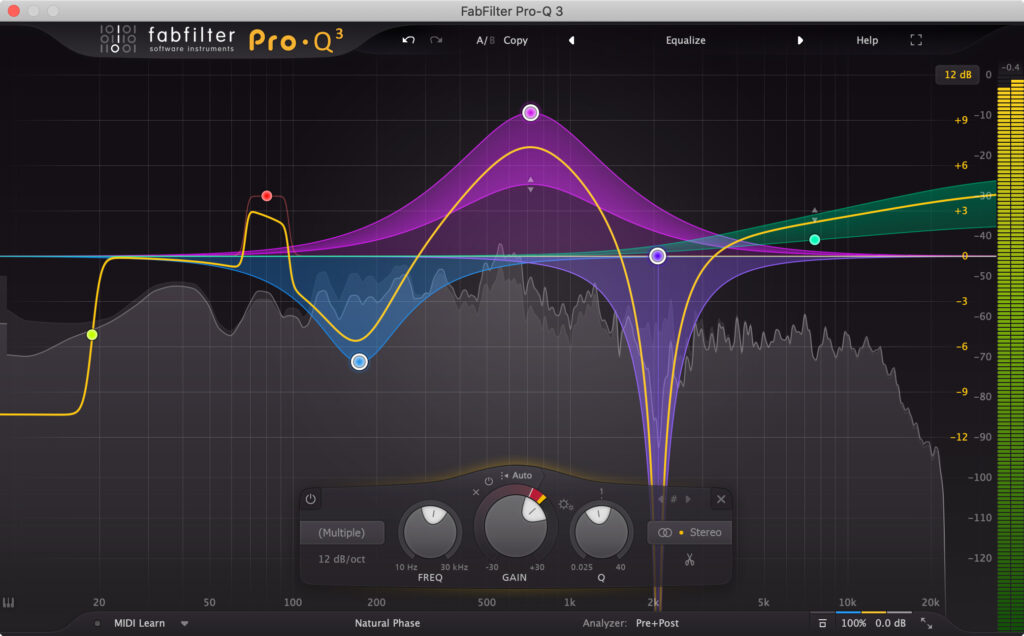
Step 1: Setting Up a Band
Start by loading FabFilter Pro-Q3 on the track you want to clean up. Identify the frequency range where the problem lies. Create a new band by double-clicking on the desired frequency area in the Pro-Q3 interface.
Step 2: Adjusting the Q-Factor for Precision
Once the band is created, adjust the Q-factor to narrow the bandwidth. A higher Q-factor value means a narrower band, which allows you to target specific frequencies more accurately. This is crucial for surgical cuts as it ensures that only the problematic frequencies are affected without altering the surrounding frequencies.
Step 3: Identifying and Cutting Problematic Frequencies
To find the exact frequency that needs cutting, use the solo feature in Pro-Q3. Click on the headphone icon next to the band to solo the frequency range and sweep through the spectrum. Listen carefully for any resonances, ringing, or harshness. Once identified, lower the gain of the band to cut the problematic frequency. I usually start with a reduction of 3-6 dB and adjust as needed.
Examples of Common Scenarios for Surgical Cuts
Removing Resonances:
Instruments like guitars, pianos, and vocals can sometimes produce resonant frequencies that stand out unpleasantly in a mix. By using Pro-Q3 to make surgical cuts, you can tame these resonances and create a more balanced sound.
Reducing Harshness:
Harshness often occurs in the high-mid range, around 2kHz to 5kHz. Using Pro-Q3 to make surgical cuts in this range can smooth out the sound, making it more pleasant to listen to.
Cleaning Up Low-End Rumble:
Low-frequency rumble from environmental noise or mic handling can muddy up a mix. Surgical cuts with a narrow Q-factor can effectively remove these unwanted low frequencies without affecting the warmth of the track.
2. Spectrum Grab with Dynamics
FabFilter Pro-Q3’s Spectrum Grab with Dynamics is a feature that I find incredibly powerful for maintaining a balanced mix. This capability allows you to dynamically control the frequency spectrum, addressing resonant peaks that change over time, and ensuring a smoother, more consistent sound.
Step-by-Step Guide to Using Spectrum Grab with Dynamics
Step 1: Enabling Dynamic EQ
First, load FabFilter Pro-Q3 on your track. To use the dynamic EQ feature, create a band by double-clicking on the frequency spectrum. Once the band is created, you’ll see an option to enable dynamics. Click on the “Dynamic Range” button to activate it.
Step 2: Creating Dynamic Bands
After enabling the dynamic EQ, adjust the dynamic range of the band. This determines how much the EQ band will react to changes in the input signal’s amplitude. You can set the dynamic range to either boost or cut frequencies dynamically, depending on the needs of your mix.
Step 3: Setting Threshold and Range
To fine-tune the dynamic EQ, set the threshold and range. The threshold determines the level at which the dynamic processing kicks in. The range sets the maximum amount of gain reduction or increase that will be applied. By carefully setting these parameters, you can ensure that the dynamic EQ reacts appropriately to the signal’s amplitude variations.
Practical Applications and Examples
Controlling Resonant Peaks:
Instruments and vocals can often produce resonant peaks that vary in intensity. By using the Spectrum Grab with Dynamics feature, you can dynamically reduce these peaks only when they become problematic, preserving the natural sound of the instrument or vocal performance.
Maintaining Balance Over Time:
Dynamic EQ is particularly useful for tracks with fluctuating energy levels, such as drums or vocals. By setting the dynamic EQ to react to changes in the signal, you can maintain a consistent tonal balance throughout the track, preventing certain frequencies from becoming overpowering at louder moments.
Enhancing Mix Transparency:
Dynamic EQ can help in creating a more transparent mix by ensuring that certain frequency ranges are kept in check without applying constant static EQ adjustments. This leads to a mix that breathes and adapts, enhancing the overall clarity and coherence.
Example Use Case: Vocals
When mixing vocals, resonant peaks can sometimes cause harshness or boxiness, especially in the mid-range. By using the dynamic EQ in Pro-Q3, I can set a band around the problematic frequency range, enable dynamics, and set a threshold that only reduces the gain when the resonance becomes too pronounced. This way, the vocal retains its natural character while unwanted peaks are controlled.
[showmodule id=”25108195″]
3. Filtering
Filtering is a fundamental technique in audio production, and FabFilter Pro-Q3 provides an extensive range of filter types and options to shape the tonal balance of your mix. Whether you need to clean up low-end rumble or tame high frequencies, Pro-Q3’s filtering capabilities are both versatile and powerful.
Step-by-Step Guide to Applying Filters with Pro-Q3
Step 1: Selecting the Appropriate Filter Type
FabFilter Pro-Q3 offers various filter types, including low-pass, high-pass, band-pass, and notch filters. To select a filter type, click on the band in the frequency spectrum and choose the desired filter from the drop-down menu. Each filter type serves a different purpose, so choose one based on the specific needs of your mix.
Step 2: Adjusting Slope and Frequency
Once you have selected a filter type, adjust the slope and frequency to fine-tune the filter’s effect. The slope determines how steeply the filter cuts off frequencies. Pro-Q3 provides slope options ranging from a gentle 6dB/octave to a steep 96dB/octave. Adjust the frequency by dragging the filter point left or right in the spectrum display to target the specific range you want to affect.
Step 3: Implementing the Filter
Apply the filter by listening to how it affects the track in real-time. Make adjustments as necessary to ensure the filter is achieving the desired effect without negatively impacting other elements of the mix.
Use Cases for Filtering
Removing Low-End Rumble:
Low-frequency noise, such as environmental rumble or mic handling noise, can muddy up a mix. Using a high-pass filter, you can remove these unwanted low frequencies. For example, when mixing vocals or acoustic guitars, I typically set a high-pass filter around 80Hz to 100Hz to clean up the low end without affecting the warmth of the track.
Taming High Frequencies:
A high-pass filter can also be used to remove unnecessary high-frequency content, which can help reduce hiss or sibilance. When dealing with cymbals or hi-hats, a low-pass filter set around 15kHz to 18kHz can help tame overly bright elements while preserving the presence.
Shaping Tonal Balance:
Filters can be used creatively to shape the overall tonal balance of a mix. For example, using a band-pass filter can focus on a specific frequency range, enhancing certain elements while reducing others. This technique is particularly useful for creating space in a dense mix, allowing each instrument to have its own defined frequency range.
4. Broad Stroke Moves
Broad stroke EQ moves are essential for shaping the overall tonal balance of a mix. Unlike surgical cuts or precise adjustments, broad stroke moves involve making larger, more generalized EQ changes to affect the entire mix or significant portions of it. FabFilter Pro-Q3 excels in this area, providing the tools to make impactful, sweeping changes that can dramatically improve your mix.
Step-by-Step Guide to Implementing Broad Stroke Moves with Pro-Q3
Step 1: Creating Wide Q-Factor Bands
To start making broad stroke moves, create a new band by double-clicking on the frequency spectrum in Pro-Q3. For broad adjustments, set the Q-factor to a lower value, which widens the bandwidth of the EQ band. This allows you to boost or cut larger sections of the frequency spectrum rather than targeting specific frequencies.
Step 2: Boosting or Cutting Large Frequency Ranges
Once you have a wide band, decide whether you need to boost or cut the selected frequency range. Drag the gain handle up to boost or down to cut the frequencies within the band. Broad strokes typically involve more subtle adjustments, such as a few dB of boost or cut, to gently shape the overall tonal balance.
Step 3: Listening and Adjusting
As with any EQ adjustment, use your ears to guide you. Listen to how the changes affect the overall mix and make adjustments accordingly. It’s essential to maintain the natural sound of the mix while enhancing the desired characteristics.
Examples of When to Use Broad Stroke Moves
Shaping Overall Mix Tonality:
Broad stroke moves are ideal for adjusting the overall tonal balance of a mix. For example, if a mix sounds too muddy, you can make a broad cut in the lower midrange (around 200Hz to 500Hz) to clean it up. Conversely, if the mix lacks brightness, a gentle boost in the high frequencies (above 8kHz) can add sparkle and air.
Enhancing Clarity and Definition:
Boosting the presence range (around 2kHz to 5kHz) can enhance clarity and definition, making vocals and lead instruments stand out more in the mix. This broad boost helps these elements cut through without sounding harsh or overly processed.
Balancing Frequency Content:
Broad stroke moves can also be used to balance the frequency content across different elements of a mix. For instance, if the bass and kick drum are fighting for space, a broad cut in the low-mid frequencies of the bass (around 100Hz to 250Hz) can create more room for the kick drum, resulting in a clearer low end.
Example Use Case: Master Bus
When working on the master bus, broad stroke EQ moves can help glue the mix together and ensure it translates well across different playback systems. A gentle, wide boost in the high frequencies can add sheen to the entire mix, while a subtle cut in the low mids can prevent muddiness. These broad adjustments help polish the final mix and give it a professional sheen.
[showmodule id=”25108216″]
5. Mid/Side EQ
Mid/Side EQ is a powerful technique that allows you to separately process the mid (center) and side (stereo) elements of your mix. FabFilter Pro-Q3’s Mid/Side mode provides precise control over the stereo field, enabling you to enhance the width, focus on central elements, and create a more immersive listening experience.
Step-by-Step Guide to Using Mid/Side EQ with Pro-Q3
Step 1: Switching to Mid/Side Mode
To begin, load FabFilter Pro-Q3 on your track and switch the EQ mode to Mid/Side. You can do this by selecting the “Processing” button at the bottom of the interface and choosing “Mid/Side” from the drop-down menu. This will split the EQ bands into two separate sections: Mid and Side.
Step 2: Adjusting Mid and Side Channels Separately
With Mid/Side mode enabled, you can now create and adjust EQ bands specifically for the mid or side channels. To create a band, double-click on the frequency spectrum. Once the band is created, you can assign it to either the mid or side channel by selecting the appropriate button in the band controls.
Step 3: Practical Applications of Mid/Side EQ
Enhancing Stereo Width:
To increase the stereo width of your mix, you can boost the high frequencies in the side channel. This technique adds air and sparkle to the sides, making the mix sound wider and more open. Be cautious with the amount of boost to avoid creating an overly bright or harsh sound.
Focusing Center Elements:
If you want to enhance the clarity and focus of central elements like vocals, bass, or kick drum, you can make EQ adjustments in the mid channel. For instance, a gentle boost in the midrange (around 1kHz to 5kHz) can help vocals stand out more prominently in the mix.
Cleaning Up Low-End:
Low-end frequencies can sometimes cause phase issues and muddiness in the stereo field. By applying a high-pass filter to the side channel, you can clean up the low end, ensuring that the bass and kick drum remain focused in the center, which results in a tighter and more defined low-frequency response.
Creating Space in the Mix:
Mid/Side EQ can also be used to create space for different elements in the mix. For example, if you have wide stereo pads or effects, you can make a gentle cut in the mid channel to allow more room for the central elements, creating a more balanced and spacious mix.
Example Use Case: Stereo Enhancement
When mixing a dense arrangement with multiple instruments, using Mid/Side EQ can help achieve a more balanced stereo image. By boosting the side channel in the high frequencies, you can add width to the mix, making it sound more expansive. Simultaneously, making subtle cuts in the low-mids of the mid channel can prevent the mix from sounding cluttered, ensuring that each element has its own space.
Conclusion
FabFilter Pro-Q3 is a versatile and powerful EQ plugin that has become an essential part of my mixing and mastering toolkit. Its ability to perform precise surgical cuts, dynamically control the frequency spectrum, apply various filtering techniques, make broad stroke EQ moves, and utilize Mid/Side EQ for stereo enhancement makes it an invaluable asset for any audio engineer.
By leveraging these top five techniques—surgical cuts, Spectrum Grab with Dynamics, filtering, broad stroke moves, and Mid/Side EQ—you can significantly enhance the quality and clarity of your mixes. Each method offers unique benefits and can be applied to a wide range of mixing scenarios, helping you achieve a professional sound that translates well across different playback systems.
I encourage you to experiment with these techniques in your own projects and discover how FabFilter Pro-Q3 can elevate your music production. Whether you’re addressing problematic frequencies, shaping the tonal balance, or enhancing the stereo image, Pro-Q3 provides the tools you need to take your mixes to the next level.