Understanding the Basics of Song Mastering
What is Song Mastering?
Mastering, in my experience working with both major label and independent artists, is often the final polish that takes a song from “great” to “ready for release.” It’s the last stage in the music production process, where a song is fine-tuned to sound cohesive, and ready for release as described here by iZotope. This involves critical listening and subtle adjustments using tools like equalization (EQ), compression, limiting, and stereo enhancement. The goal is to ensure the track sounds balanced and consistent across all playback systems—from studio monitors to car stereos to earbuds.
Why Proper Preparation for Mastering Matters
Many artists and producers believe mastering can fix a bad mix. But the truth is, mastering can only enhance what’s already there. I’ve worked on hundreds of tracks where small issues in the mix became very noticeable during mastering. If the mix is unbalanced or distorted, mastering won’t fix it—it will just highlight the flaws. That’s why I always stress the importance of preparing your song meticulously.
Pre-Mastering Essentials
The Role of Mixing in Mastering
A well-mixed song is the cornerstone of a great master. Every element should have space in the stereo field and a clear balance across the frequency spectrum. I often tell clients: if your mix feels “done,” mastering will make it feel “final.”
Technical Aspects of Preparing Your Song
When exporting your mix for mastering, quality is everything. Always use lossless formats like WAV or AIFF. The bit depth should be 24-bit with a sample rate of at least 44.1 kHz (though 48 or 96 kHz is preferred for high-resolution masters). Leave about -6dB to -3dB of headroom. This gives me the space I need to apply processing without introducing clipping.
Practical Steps to Prepare Your Songs for Mastering
Cleaning Up Your Tracks
I recommend doing a final pass to listen for background noise, hums, or unwanted artifacts. Even subtle clicks can affect how polished your master sounds. Make sure the track starts and ends cleanly. A fade-in or fade-out can make all the difference in flow.

Checking Levels and Balances
Use metering tools alongside your ears. Pay attention to frequency balance as much as volume. If the low end is too overpowering or the high end is too dull, it’s better to fix it in the mix than during mastering.
The Role of EQ and Compression Before Mastering
EQ should clean up mud and avoid harshness. I typically recommend subtractive EQ moves over boosting. Compression should maintain dynamics, not crush them. A slightly dynamic mix gives me more flexibility to add punch and clarity during mastering.
Advanced Preparation Techniques
Using Reference Tracks
I always encourage artists to include 1-2 reference tracks when they send me a song for mastering. These give me context on your target sound—whether it’s a clean vocal-forward pop track or a gritty underground hip-hop vibe.
The Importance of Listening Environment
Your mixing room dramatically affects your decision-making. I’ve had clients ask why their track sounds different mastered versus mixed—and it often comes down to untreated rooms or poor monitoring setups. Acoustic treatment and properly placed speakers matter more than having the most expensive gear.
Collaborating with a Mastering Engineer
Communicating Your Vision
Before sending your tracks, include a brief outlining what you’re going for. When artists tell me they love the “snap” of the snare or the “warmth” in the low end of a reference track, it helps me approach the master with the right intention.
Understanding Mastering Options
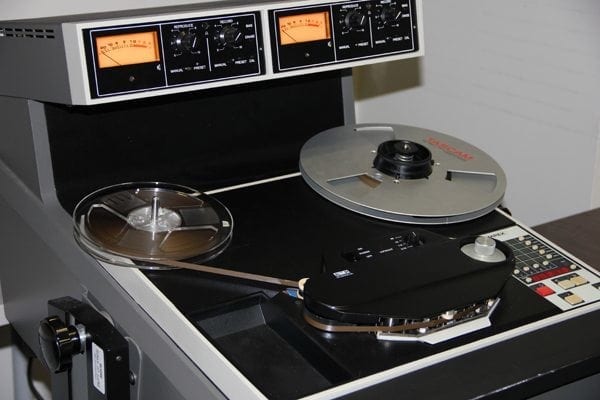
Mastering today isn’t one-size-fits-all. I offer digital mastering for precision, analog mastering for warmth and vibe, and stem mastering when you need more flexibility than a single stereo file. If you’re not sure which is best, just ask—I’ll help guide you based on the track.
Final Checks Before Sending Off for Mastering
Metadata and File Organization
Clearly label your files with track title, artist name, and order. If you have ISRC codes, include them. These small details help keep things organized and efficient, especially if we’re working on an EP or album.
Common Mistakes to Avoid in Pre-Mastering
Here are some common issues I see:
- Over-EQing: Overcompensating in the final mix stage can hurt more than help.
- Over-Compression: If it’s already flat and lifeless, there’s not much I can do.
- Ignoring Transients: Preserve the snap and dynamics for a punchier master.
- File Format Errors: I prefer WAV or AIFF. Avoid MP3s or other lossy formats.
Post-Preparation: Final Steps Before Mastering
Final Listening Session
Do a final check in a familiar, quiet environment. Listen through a few systems—your studio monitors, headphones, a car stereo. Make notes of anything that jumps out. But don’t over-tweak last-minute—sometimes “fixing” one thing introduces two new problems.
Exporting Tracks Correctly
Make sure each track is exported with consistent sample rate and bit depth. Don’t trim reverb tails or delay throws—those are part of the final feel. I also recommend including a second or two of silence at the beginning and end for clean transitions.
Backup Your Mixes
Always keep backups of the final mix and session file. I’ve had artists lose entire projects due to hard drive failure or cloud sync errors. Better safe than sorry.
After Mastering: Receiving and Reviewing the Final Product
Critical Listening to the Mastered Tracks
Once I send back the mastered tracks, listen in multiple environments. Compare it to your references and your mix. Take notes if something feels off—maybe the vocal feels buried or the low end is too tame.
Providing Feedback
Don’t hesitate to give feedback. Mastering is collaborative. I’d much rather do one or two revisions and get it just right than leave you unsure about the final version.
Final Approval and Release Preparation
Once you’re happy with the final master, it’s ready for release. This is the time to finalize your album artwork, ISRC codes, and metadata. Congratulations—you’re ready to share your music with the world.
Conclusion: The Importance of Mastering Preparation
Mastering is a critical step in the music production process, and its success largely depends on how well you prepare your tracks. By following the steps outlined in this guide, you ensure that your music has the best chance to shine in its final form. Remember, mastering isn’t just about making your music loud – it’s about making it emotionally impactful and ready to be enjoyed everywhere.
Want help getting your mix to that final stage? Check out my professional mixing and mastering services to take your song from rough to release-ready.

