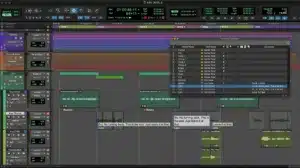
Pro Tools Beat Detective is a powerful tool in Pro Tools that aids in the manipulation and correction of rhythmic elements within audio tracks. It’s commonly used in music production to tighten up timing issues, correct inconsistencies, and align beats to a grid. Here’s a comprehensive guide on how to effectively use Beat Detective in Pro Tools:

Understanding Beat Detective:
Beat Detective is a feature within Pro Tools designed to analyze audio and detect rhythmic information. It’s particularly helpful in fixing timing discrepancies, quantizing audio, and adjusting the placement of beats. This tool is invaluable when working with live recordings or multi-tracked instruments that may not perfectly align with the desired tempo.
Steps to Use Beat Detective:
1. Preparation:
- Import or record the audio track you want to edit into Pro Tools.
- Set the session tempo appropriately to match the performance.
2. Selection:
- Highlight the portion of the track you want to analyze and correct using Beat Detective. Ensure the selection covers a complete musical phrase or section.
3. Beat Detection:
- Open Beat Detective by navigating to the ‘Event’ menu and selecting ‘Beat Detective.’
- Choose the ‘Analysis’ tab within Beat Detective.
- Click ‘Selection’ to analyze the selected audio.
4. Analysis Options:
- Adjust the sensitivity settings to fine-tune the beat detection process. Higher sensitivity settings might detect more transient information but can also lead to false positives. Lower settings might miss some transient information.
5. Capture Selection:
- Click ‘Capture Selection’ to create a selection from the detected beats.
6. Edit Smoothing:
- Access the ‘Edit Smoothing’ tab in Beat Detective to refine the detected beats.
- Use functions like ‘Separate’ to split detected regions that need individual adjustment, ‘Fill Gaps’ to close any spaces between detected regions, or ‘Flatten’ to smooth out the edits.
7. Apply Changes:
- Once satisfied with the adjustments, click ‘Commit’ to apply the changes to the selected audio.
8. Review and Fine-Tuning:
- Listen to the modified section and make further adjustments if necessary. You may need to tweak the sensitivity settings or redo the process for sections that need more attention.
9. Quantization:
- To quantize audio to a specific grid, use the ‘Edit Smoothing’ or ‘Quantize’ feature within Beat Detective. This aligns the audio to the selected grid based on your preferences.
10. Finalize and Save:
- Once all edits are complete, save your Pro Tools session to retain the changes made by Beat Detective.
Tips for Efficient Use:
- Practice and Experiment: Familiarize yourself with the different settings and options in Beat Detective to understand how they affect the results.
- Backup Originals: Before making extensive changes, always create a backup or duplicate of the original audio files to prevent permanent alterations.
- Use in Moderation: Over-editing with Beat Detective can sometimes lead to unnatural-sounding results. Use it judiciously to retain the natural feel of the performance.
Conclusion:
Beat Detective in Pro Tools is a valuable tool for correcting timing issues and aligning audio to a grid. By following these steps and experimenting with its various options, you can effectively use Beat Detective to improve the rhythmic accuracy of your audio tracks, ultimately enhancing the overall quality of your music production in Pro Tools.
