Mixing Vocals with the FabFilter Pro-Q3
When it comes to mixing vocals, achieving clarity and balance is essential. One powerful tool that can assist in this process is the FabFilter Pro-Q3. In this blog post, we’ll explore some techniques to enhance vocals using this versatile EQ plugin.
Step 1: Cleaning Up the Low-End
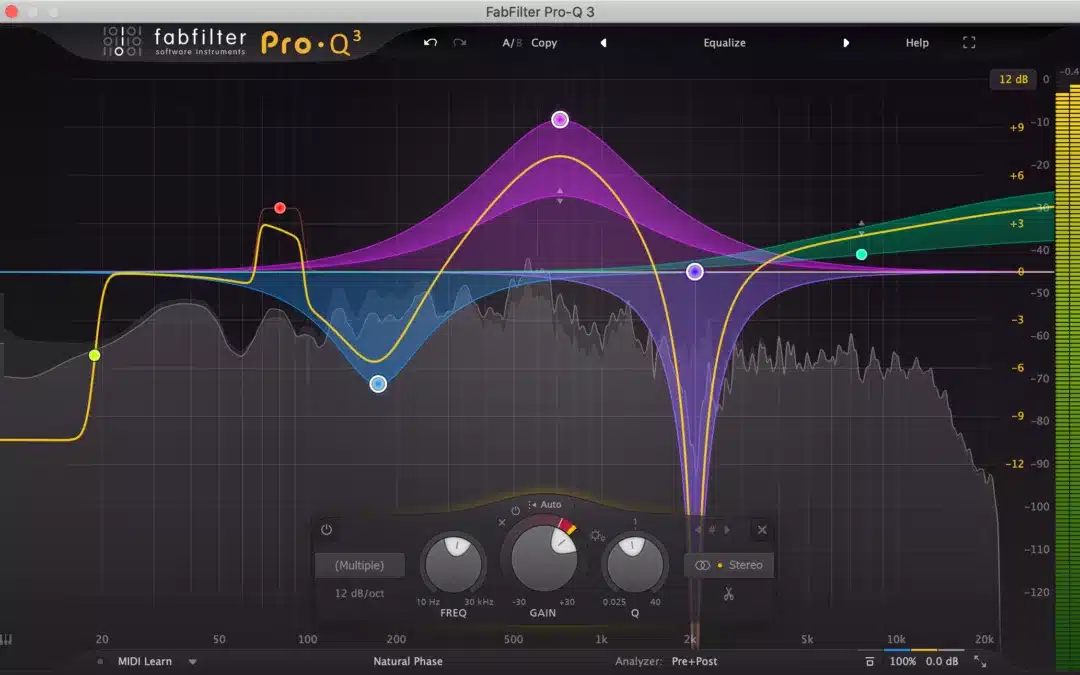
One of the first steps in vocal mixing is to address the low-end frequencies. Often, vocals can contain unnecessary low-end rumble that can clutter the mix. To tackle this, start by applying a low-cut filter to remove the unwanted frequencies. Set the filter to a 12 dB per octave slope and adjust the cutoff frequency between 70 to 100 Hz, depending on the vocal’s characteristics. This initial low-cut provides a clean foundation for the vocal to sit in the mix.
Step 2: Tackling Unpleasant Frequencies
Next, it’s time to address any problematic frequencies in the vocal. Commonly, these can occur around 200 to 500 Hz and may result in muddiness or boxiness. Using the FabFilter Pro-Q3, isolate these frequencies by applying a narrow boost and sweeping through the range to find the offending areas. Once identified, reduce the gain to create a more balanced and pleasing sound. This process helps to define the vocal and removes any unwanted resonances.
Step 3: Enhancing Presence and Clarity
To make the vocals stand out and cut through the mix, it’s important to enhance their presence and clarity. The FabFilter Pro-Q3 offers precise control over the mid-range frequencies, allowing you to shape the desired tonal balance. Experiment with gentle boosts around 2 to 4 kHz to add brightness and articulate the vocal performance. Be mindful not to overdo it, as excessive boosts can result in harshness. Use your ears and make subtle adjustments to achieve the desired effect.
Step 4: De-Essing
De-essing is a crucial step in vocal mixing to control sibilance and reduce harsh “s” sounds. The FabFilter Pro-Q3 offers a dynamic EQ feature that can easily tame excessive sibilance. Identify the sibilant frequencies by listening closely to the vocal track and then apply a narrow cut using the dynamic EQ mode. Adjust the threshold and ratio to effectively attenuate the sibilant peaks, ensuring a smoother and more controlled vocal performance.
Step 5: Final Adjustments and Fine-Tuning
Once you have addressed the major aspects of vocal mixing, it’s time for the final adjustments and fine-tuning. Use the FabFilter Pro-Q3 to make subtle tweaks to the overall tone, addressing any remaining frequency imbalances. Pay attention to the high-end frequencies to ensure a smooth and pleasing presence without any harshness. Additionally, keep an eye on the overall level of the vocal, making sure it sits well within the mix without overpowering or getting lost.
Remember, every vocal recording is unique, and these steps serve as a starting point. Trust your ears and make adjustments that best suit the specific vocal and the overall mix. The FabFilter Pro-Q3 provides the tools necessary to sculpt vocals with precision and creativity.
So, next time you find yourself mixing vocals, reach for the FabFilter Pro-Q3 and follow these steps to achieve a polished, professional sound. Happy mixing!
Step 6: Enhancing the Vocals Using FabFilter’s Natural Phase Mode
When working with vocals, consider setting your FabFilter to its Natural Phase Mode as a default. You might notice that low cuts and high cuts don’t sound as grainy in zero latency as they do in Natural Phase Mode, making it a more ideal choice for vocal processing. While it doesn’t significantly affect CPU performance, this mode can add a hint of brightness and energy to the vocals, making them more prominent and ‘in-your-face’.
Step 7: Boosting and Dynamic EQ for Brightness and Sibilance Control
At times, while boosting the vocals, you may prefer to use more colorful plugins like Clara Phonic or Pultec. However, giving a slight 3 dB boost shelf using FabFilter can have a subtle but effective impact, adding brightness to the vocals. Considering the dynamic EQ, it’s beneficial to apply it around 10K, especially when dealing with excessive sibilance. This can really tighten up the vocals, making them clearer and more vivid.
Step 8: Taming Harsh Frequencies and Final Thoughts
Depending on the vocal recording, sometimes you may need to clean up any harsh frequencies using the dynamic EQ. As I’ve found, FabFilter Pro-Q3 is a versatile plugin that’s incredibly effective for vocals. While I often lean towards SSL plugins for drums and other instruments, when it comes to vocals, FabFilter Pro-Q3 is my go-to. It helps clean up the sound and prepare the vocals for additional processing with more colorful EQs like Neve or Clara Phonic.
In conclusion, working with vocals is a meticulous process that involves various stages of sound enhancement and modification. FabFilter Pro-Q3, with features like Natural Phase Mode, dynamic EQ, and frequency taming, proves to be an invaluable tool in this process. In addition to this, judicious use of colorful plugins like Clara Phonic or Pultec can also enrich vocal tracks. However, every vocal track is unique, and the techniques mentioned here should be adapted and modified based on the specific needs of each track. With adequate practice and experimentation, you can effectively enhance vocal tracks, resulting in a more polished and captivating sound.
Feel free to drop your thoughts or questions in the comments. If you need your song mixed and mastered, make sure to reach out.
Thanks for tuning in, and until next time, keep creating amazing music!